DIY Outdoor Kitchen Backsplash
Learn how to install a tile backsplash on your outdoor kitchen! Protect the area behind your grill and upgrade your aesthetics with this one weekend project.

Since we built our DIY outdoor kitchen it has seen so much action!
Our goal with the many backyard projects we’ve done over the years has been to make it feel like a vacation. And it does (except for when we do yard work!).
Psst — for more backyard ideas and home DIYs, be sure to sign up below for my VIP group. I send these folks more of my very best projects and how-tos.
Adding a Backsplash to an Outdoor Kitchen
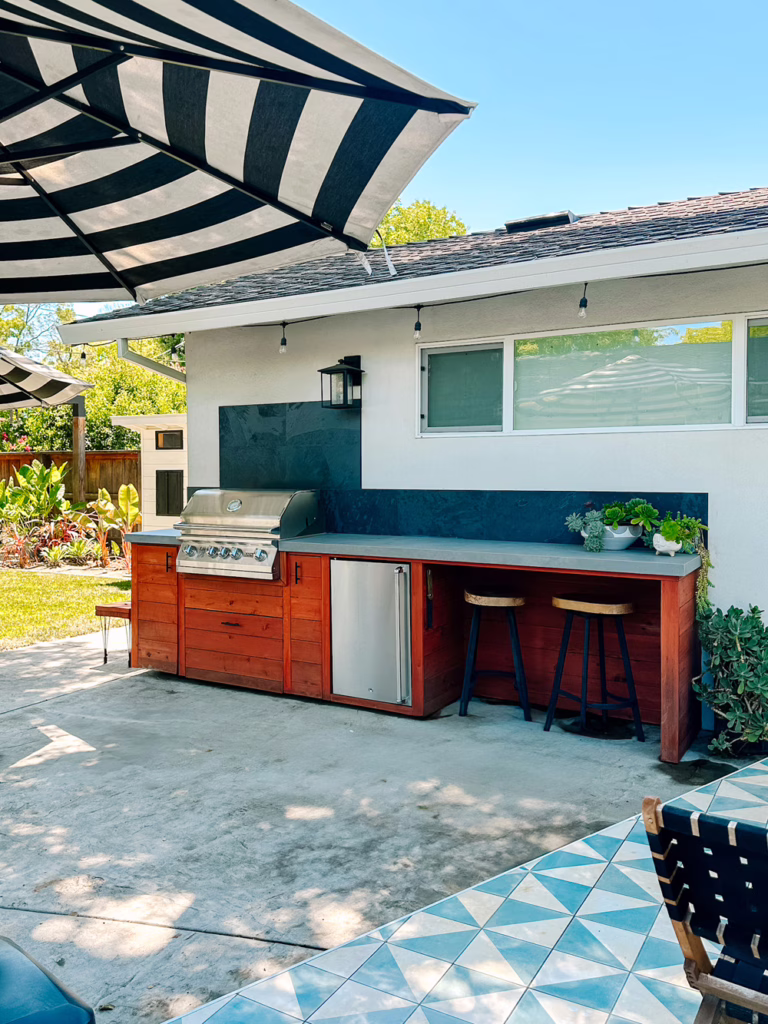
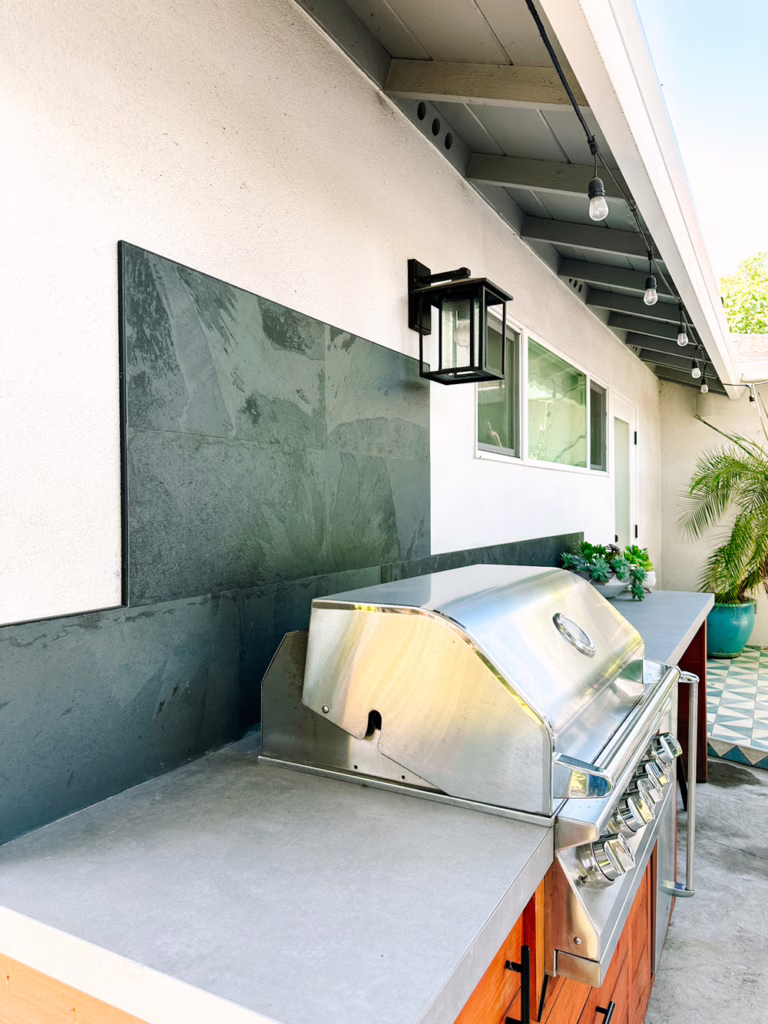
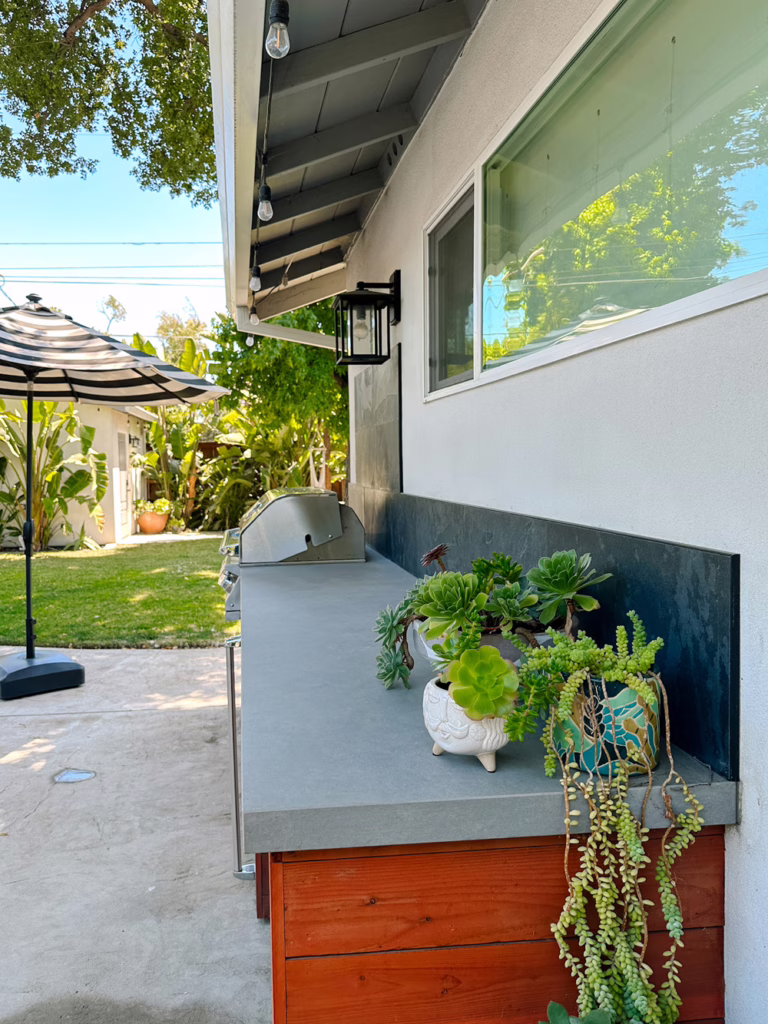
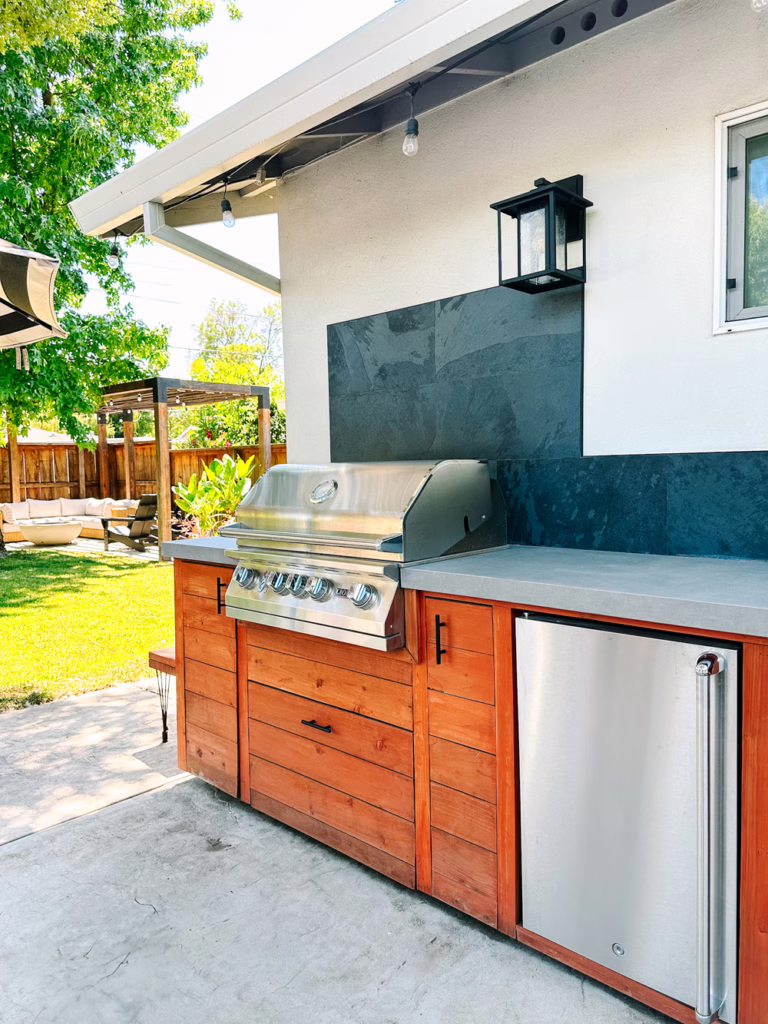
The outdoor kitchen and grill have gotten so much use that we found there was a stain developing on the wall behind the grill.
Totally normal, of course, for a grill to throw off smoke and grease that would stain. But because our wall is white, it was pretty apparent and becoming an eyesore.
A while back, I share some ideas for a backsplash after lots of research. I mocked up ideas with everything from different types of sheet metal to various tiles.
Here are a few of those mockups!
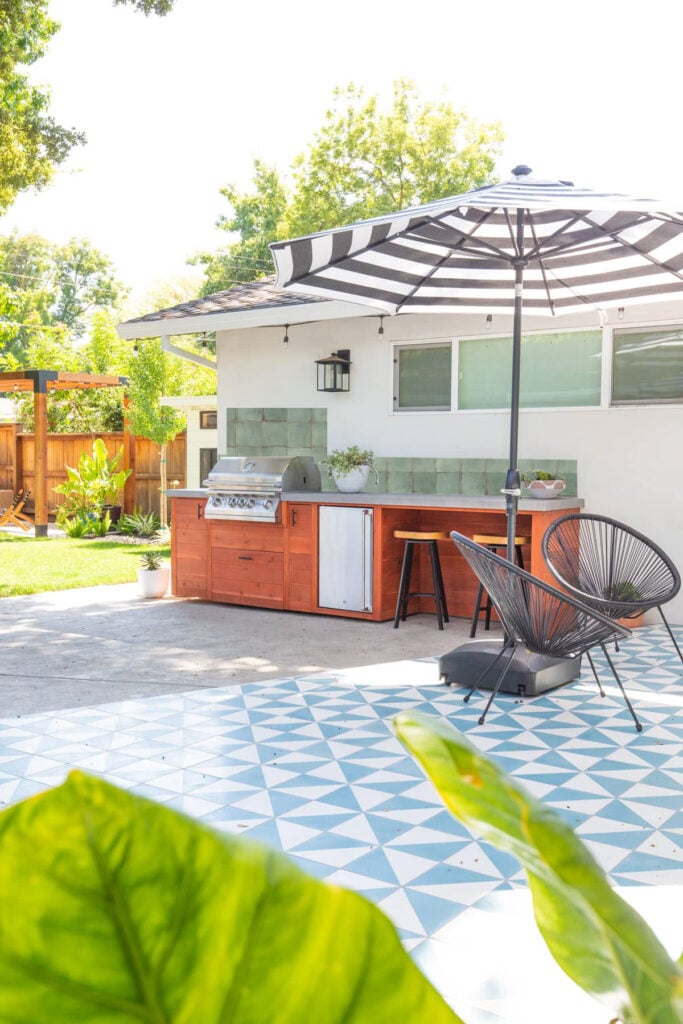
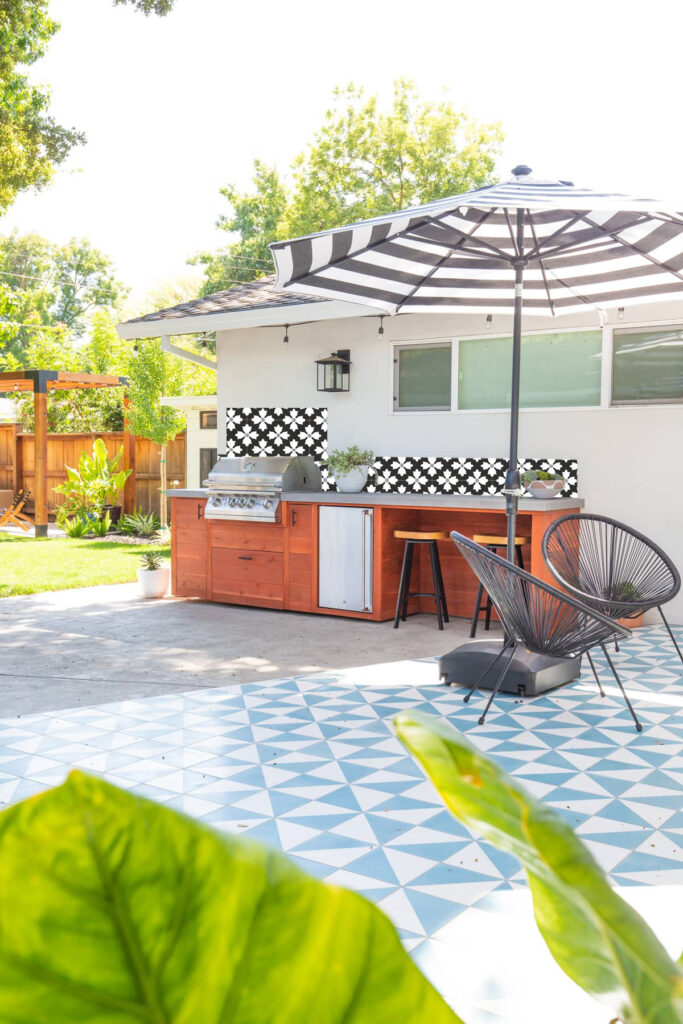
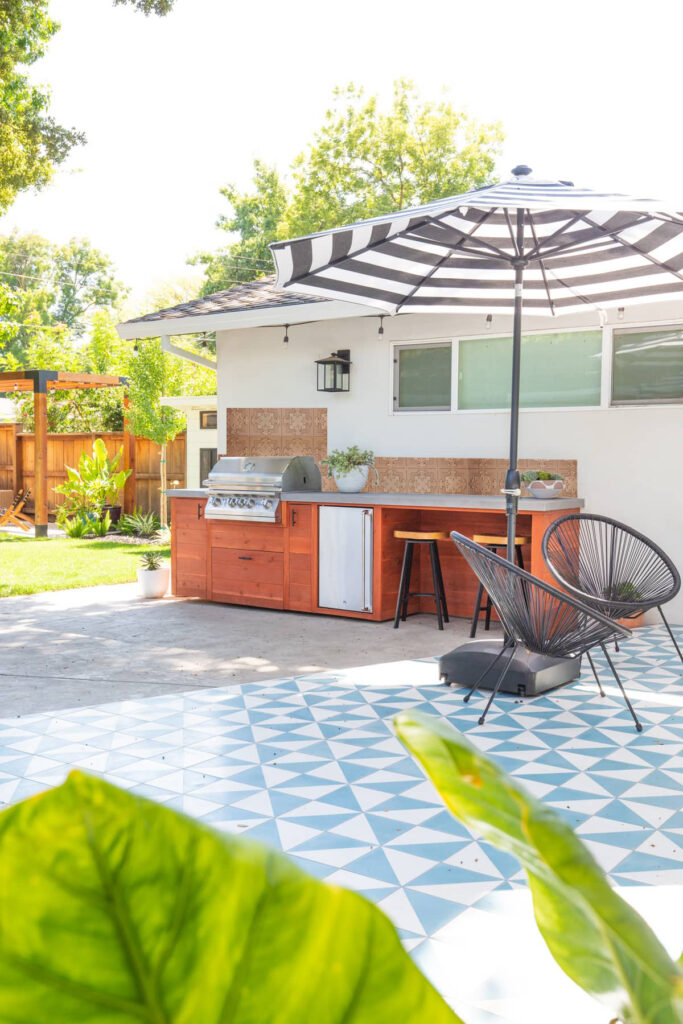
Selecting Backsplash Materials for an Outdoor Kitchen
Eventually we decided that black would be our best bet for a few reasons.
First and foremost, anything colorful would have the same problem of showing the smoke and grease stains. While it would be easier to clean than our stucco wall, it would show grime very quickly.
Secondly, we have black accents elsewhere in the yard and I liked the way it both tied in and grounded the space.
And finally, while I loved the idea of more pattern, I didn’t want to to compete too starkly with our patio tile.
We found something we loved at Home Depot at a great price point – we needed two cases of the Montauk Black Slate Tile to cover our square footage, which came to just about $70.
I loved that it had some interesting texture, and that it has cool undertones when the light hits it.
How to Add a Tile Backsplash to Your Outdoor Kitchen
So let’s get to the installation! You’ll first need to prep your area.
Clean and Prep Area
- The day before application, scrub the area with water and a grease-reducing soap like Dawn. Remove as much grease, dirt, and debris as possible. Allow to dry overnight.
- The day of your installation, wipe away any debris that may have accumulated. I also recommend blowing the area clean with a leaf blower or something similar.
- Clear the counter in front of your space and lay down a drop cloth if desired.
Prep Tile and Tools
- If you’ll need any tile cut, you can either cut them at home if you have the tools, or some hardware stores will do it for you if you have your precise measurements.
- Also cut any finishing pieces; we used a schluter strip around the edges of our tiles. Measure and cut any of these pieces as well.
- Gather your materials:
- tile
- schluter strip
- Simple Set thinset mortar
- square notch trowel
- sponges
- pre-mixed grout
- grout float
- optional: tile spacers
How to Install Tile
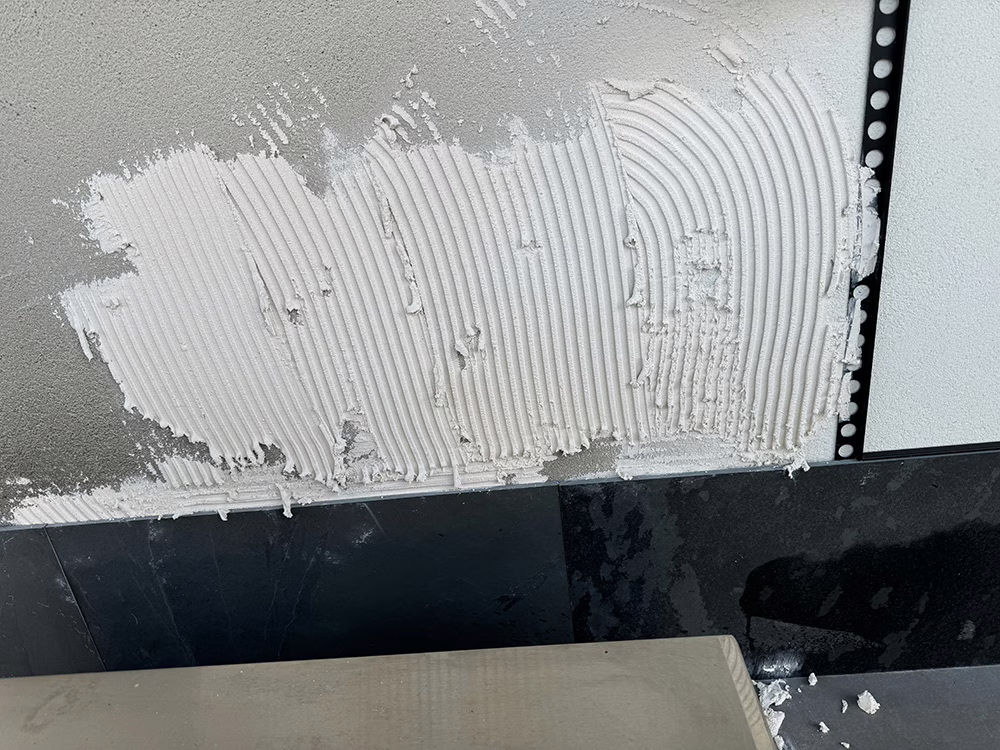
- Make sure before you begin that you’ve measured and calculated the placement of your tile.
- Using your notched trowel, scoop out some mortar and apply it to the wall behind the area where your tile will be. You want to use the notches to created grooves in the mortar.
- Press a tile into the mortar and hold it gently until it adheres.
- If you are using a schluter strip like we did, you can slide the strip in while the mortar is still wet. Depending on the configuration of your tiled area, you can have some strip applied to the wall before you apply the next tile (see photos below).
- Our tile was cut so that there was minimal space between each tile. If you’d like more space between your tiles, use tile spacers as you apply it to the wall.
- Continue to repeat Steps 2 and 3 until your entire area is tiled.
- It’s preferable that you wait about 48 hours after applying the tile with Simple Set before grouting.

Applying Grout
- Use a grout float to scoop some grout onto the edge of the float and press it into the seams between your tiles. Ensure that the seams are filled and level.
- Use a sponge with a bucket of water to wipe away extra grout. We found that with this tile a few extra rounds of wiping was needed to ensure a film of grout wasn’t left behind.
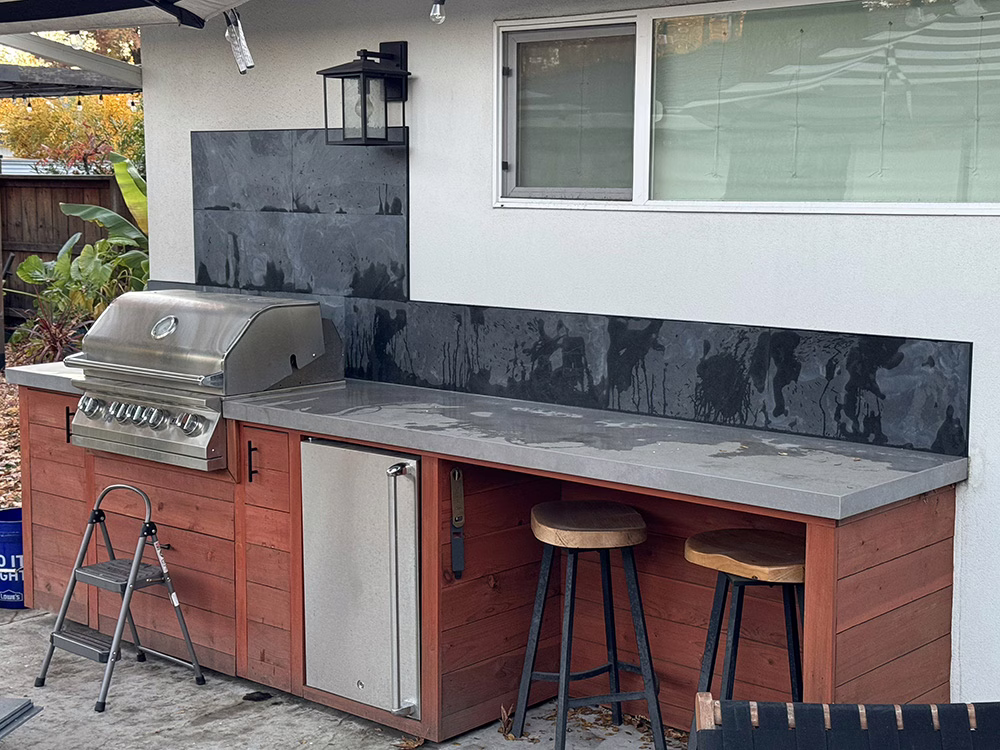
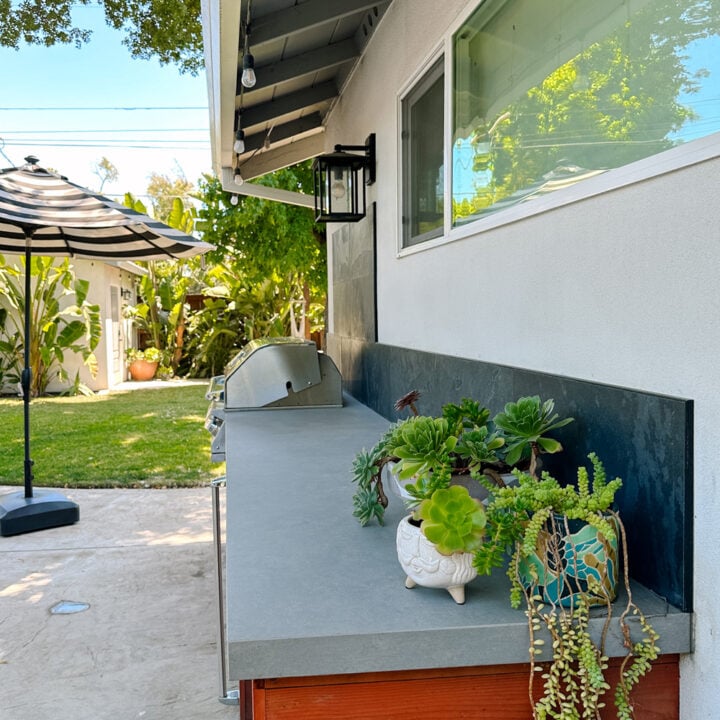
Final Result
We’re still pretty thrilled with how it turned out! The tile is protecting the wall and it’s holding up beautifully.
Be sure to check out our other backyard (and front yard!) projects for lots more inspiration. xoxo

DIY Outdoor Kitchen Tile Backsplash
Learn how to install a tile backsplash on your outdoor kitchen! Protect the area behind your grill and upgrade your aesthetics with this one weekend project.
Materials
- tile
- schluter strip
- Simple Set thinset mortar
- pre-mixed grout
- optional: tile spacers
Tools
- square notch trowel
- sponges
- grout float
Instructions
- The day before application, scrub the area with water and a grease-reducing soap like Dawn. Remove as much grease, dirt, and debris as possible. Allow to dry overnight.
- The day of your installation, wipe away any debris that may have accumulated. I also recommend blowing the area clean with a leaf blower or something similar.
- Clear the counter in front of your space and lay down a drop cloth if desired.
- If you'll need any tile cut, you can either cut them at home if you have the tools, or some hardware stores will do it for you if you have your precise measurements.
- Also cut any finishing pieces; we used a schluter strip around the edges of our tiles. Measure and cut any of these pieces as well.
- Make sure before you begin that you've measured and calculated the placement of your tile.
- Using your notched trowel, scoop out some mortar and apply it to the wall behind the area where your tile will be. You want to use the notches to created grooves in the mortar.
- Press a tile into the mortar and hold it gently until it adheres.
- If you are using a schluter strip like we did, you can slide the strip in while the mortar is still wet. Depending on the configuration of your tiled area, you can have some strip applied to the wall before you apply the next tile (see photos below).
- Our tile was cut so that there was minimal space between each tile. If you'd like more space between your tiles, use tile spacers as you apply it to the wall.
- Continue to repeat Steps 2 and 3 until your entire area is tiled.
- It's preferable that you wait about 48 hours after applying the tile with Simple Set before grouting.
- Use a grout float to scoop some grout onto the edge of the float and press it into the seams between your tiles. Ensure that the seams are filled and level.
- Use a sponge with a bucket of water to wipe away extra grout. We found that with this tile a few extra rounds of wiping was needed to ensure a film of grout wasn't left behind.
Notes
When in doubt, consult the label and instructions on your Simple Set and pre-mixed grout for tips.
This post contains affiliate links for your convenience. This means that I receive a small commission should you make a purchase via one of these links, at no additional cost to you. Thank you as always for your support!

You have a sunny garden. How wonderful. Do outdoor wooden chairs grow moss?
Winter’s coming, and I knew my windows needed resealing, my gutters checked, and my deck reinforced. Instead of waiting for snow, I hired a Canadian company Tony The Handyman. They covered everything in one session. If you’ve been avoiding your fall maintenance tasks, book a handyman toronto service now before they’re all swamped. Trust me, it’s cheaper than emergency repairs.
This project turned out beautifully what a smart and stylish way to upgrade an outdoor space! Love the creativity and approachable step-by-step transformation.